Build a CMS with Laravel and Vue - Part 3: Building an API
Basic knowledge of Laravel and Vue will be helpful.
In the previous part of this series, we initialized the posts resource and started building the frontend of the CMS. We designed the front page that shows all the posts and the single post page using Laravel’s templating engine, Blade.
In this part of the series, we will start building the API for the application. We will create an API for CRUD operations that an admin will perform on posts and we will test the endpoints using Postman.
The source code for this project is available here on GitHub.
Prerequisites
To follow along with this series, a few things are required:
- Basic knowledge of PHP.
- Basic knowledge of the Laravel framework.
- Basic knowledge of JavaScript (ES6 syntax).
- Basic knowledge of Vue.
- Postman installed on your machine.
Building the API using Laravel’s API resources
The Laravel framework makes it very easy to build APIs. It has an API resources feature that we can easily adopt in our project. You can think of API resources as a transformation layer between Eloquent models and the JSON responses that will be sent back by our API.
Allowing mass assignment on specified fields
Since we are going to be performing CRUD operations on the posts in the application, we have to explicitly specify that it’s permitted for some fields to be mass-assigned data. For security reasons, Laravel prevents mass assignment of data to model fields by default.
Open the Post.php file and include this line of code:
    // File: ./app/Post.php
    protected $fillable = ['user_id', 'title', 'body', 'image'];
Defining API routes
We will use the apiResource()method to generate only API routes. Open the routes/api.php file and add the following code:
    // File: ./routes/api.php
    Route::apiResource('posts', 'PostController');
Because we will be handling the API requests on the
/postsURL using thePostController, we will have to include some additional action methods in our post controller.
Creating the Post resource
At the beginning of this section, we already talked about what Laravel’s API resources are. Here, we create a resource class for our Post model. This will enable us to retrieve Post data and return formatted JSON format.
To create a resource class for our Post model run the following command in your terminal:
$ php artisan make:resource PostResource
A new PostResource.php file will be available in the app/Http/Resources directory of our application. Open up the PostResource.php file and replace the toArray() method with the following:
    // File: ./app/Http/Resources/PostResource.php
    public function toArray($request)
    {
        return [
            'id' => $this->id,
            'title' => $this->title,
            'body' => $this->body,
            'image' => $this->image,
            'created_at' => (string) $this->created_at,
            'updated_at' => (string) $this->updated_at,
        ];
    }
The job of this toArray() method is to convert our P``ost resource into an array. As seen above, we have specified the fields on our Post model, which we want to be returned as JSON when we make a request for posts.
We are also explicitly casting the dates, created_at and update_at, to strings so that they would be returned as date strings. The dates are normally an instance of Carbon.
Now that we have created a resource class for our Post model, we can start building the API’s action methods in our PostController and return instances of the PostResource where we want.
Adding the action methods to the Post controller
The usual actions performed on a post include the following:
- Create - the process of creating a new post.
- Read - the process of reading one or more posts.
- Update - the process of updating an already published post.
- Delete - the process of deleting a post.
In the last article, we already implemented a kind of ‘Read’ functionality when we defined the all and single methods. These methods allow users to browse through posts on the homepage.
In this section, we will define the methods that will resolve our API requests for creating, reading, updating and deleting posts.
The first thing we want to do is import the PostResource class at the top of the PostController.php file:
    // File: ./app/Http/Controllers/PostController.php
    use App\Http\Resources\PostResource;
Because we created the
PostControlleras a resource controller, we already have the resource action methods included for us in thePostController.phpfile, we will be updating them with fitting snippets of code.
Building the handler action for the create operation
In the PostController update the store() action method with the code snippet below. It will allow us to validate and create a new post:
    // File: ./app/Http/Controllers/PostController.php
    public function store(Request $request)
    {
        $this->validate($request, [
            'title' => 'required',
            'body' => 'required',
            'user_id' => 'required',
            'image' => 'required|mimes:jpeg,png,jpg,gif,svg',
        ]);

        $post = new Post;

        if ($request->hasFile('image')) {
            $image = $request->file('image');
            $name = str_slug($request->title).'.'.$image->getClientOriginalExtension();
            $destinationPath = public_path('/uploads/posts');
            $imagePath = $destinationPath . "/" . $name;
            $image->move($destinationPath, $name);
            $post->image = $name;
        }

        $post->user_id = $request->user_id;
        $post->title = $request->title;
        $post->body = $request->body;
        $post->save();

        return new PostResource($post);
    }
Here’s a breakdown of what this method does:
- Receives a new request.
- Validates the request.
- Creates a new post.
- Returns the post as a
PostResource, which in turn returns a JSON formatted response.
Building the handler action for the read operations
What we want here is to be able to read all the created posts or a single post. This is possible because the apiResource() method defines the API routes using standard REST rules.
This means that a GET request to this address, http://127.0.0.1:800/api/posts, should be resolved by the index() action method. Let’s update the index method with the following code:
    // File: ./app/Http/Controllers/PostController.php
    public function index()
    {
        return PostResource::collection(Post::latest()->paginate(5));
    }
This method will allow us to return a JSON formatted collection of all of the stored posts. We also want to paginate the response as this will allow us to create a better view on the admin dashboard.
Following the RESTful conventions as we discussed above, a GET request to this address, http://127.0.0.1:800/api/posts/id, should be resolved by the show() action method. Let’s update the method with the fitting snippet:
    // File: ./app/Http/Controllers/PostController.php
    public function show(Post $post)
    {
        return new PostResource($post);
    }
Awesome, now this method will return a single instance of a post resource upon API query.
Building the handler action for the update operation
Next, let’s update the update() method in the PostController class. It will allow us to modify an existing post:
    // File: ./app/Http/Controllers/PostController.php
    public function update(Request $request, Post $post)
    {
        $this->validate($request, [
            'title' => 'required',
            'body' => 'required',
        ]);

        $post->update($request->only(['title', 'body']));

        return new PostResource($post);
    }
This method receives a request and a post id as parameters, then we use route model binding to resolve the id into an instance of a Post. First, we validate the $request attributes, then we update the title and body fields of the resolved post.
Building the handler action for the delete operation
Let’s update the destroy() method in the PostController class. This method will allow us to remove an existing post:
    // File: ./app/Http/Controllers/PostController.php
    public function destroy(Post $post)
    {
        $post->delete();

        return response()->json(null, 204);
    }
In this method, we resolve the Post instance, then delete it and return a 204 response code.
Our methods are complete. We have a method to handle our CRUD operations, however, we haven’t built the frontend for the admin dashboard.
At the end of the second article, we defined the HomeController@index() action method like this:
    public function index(Request $request)
    {
        if ($request->user()->hasRole('user')) {
            return view('home');
        }

        if ($request->user()->hasRole('admin')) {
            return redirect('/admin/dashboard');
        }
    }
This allowed us to redirect regular users to the view home, and admin users to the URL /admin/dashboard. At this point in this series, a visit to /admin/dashboard will fail because we have neither defined it as a route with a handler Controller nor built a view for it.
Let’s create the AdminController with this command:
$ php artisan make:controller AdminController
We will add the /admin/ route to our routes/web.php file:
Route::get('/admin/{any}', 'AdminController@index')->where('any', '.*');
Note that we wrote
/admin/{any}here because we intend to serve every page of the admin dashboard using the Vue router. When we start building the admin dashboard in the next article, we will let Vue handle all the routes of the/adminpages.
Let’s update the AdminController.php file to use the auth middleware and include an index() action method:
    // File: ./app/Http/Controllers/AdminController.php
    <?php

    namespace App\Http\Controllers;

    class AdminController extends Controller
    {
        public function __construct()
        {
            $this->middleware('auth');
        }

        public function index()
        {
            if (request()->user()->hasRole('admin')) {
                return view('admin.dashboard');
            }

            if (request()->user()->hasRole('user')) {
                return redirect('/home');
            }
        }
    }
In the index()action method, we included a snippet that will ensure that only admin users can visit the admin dashboard and perform CRUD operations on posts.
We will not start building the admin dashboard in this article but will test that our API works properly. We will use Postman to make requests to the application.
Testing the application
Let’s test that our API works as expected. We will, first of all, serve the application using this command:
$ php artisan serve
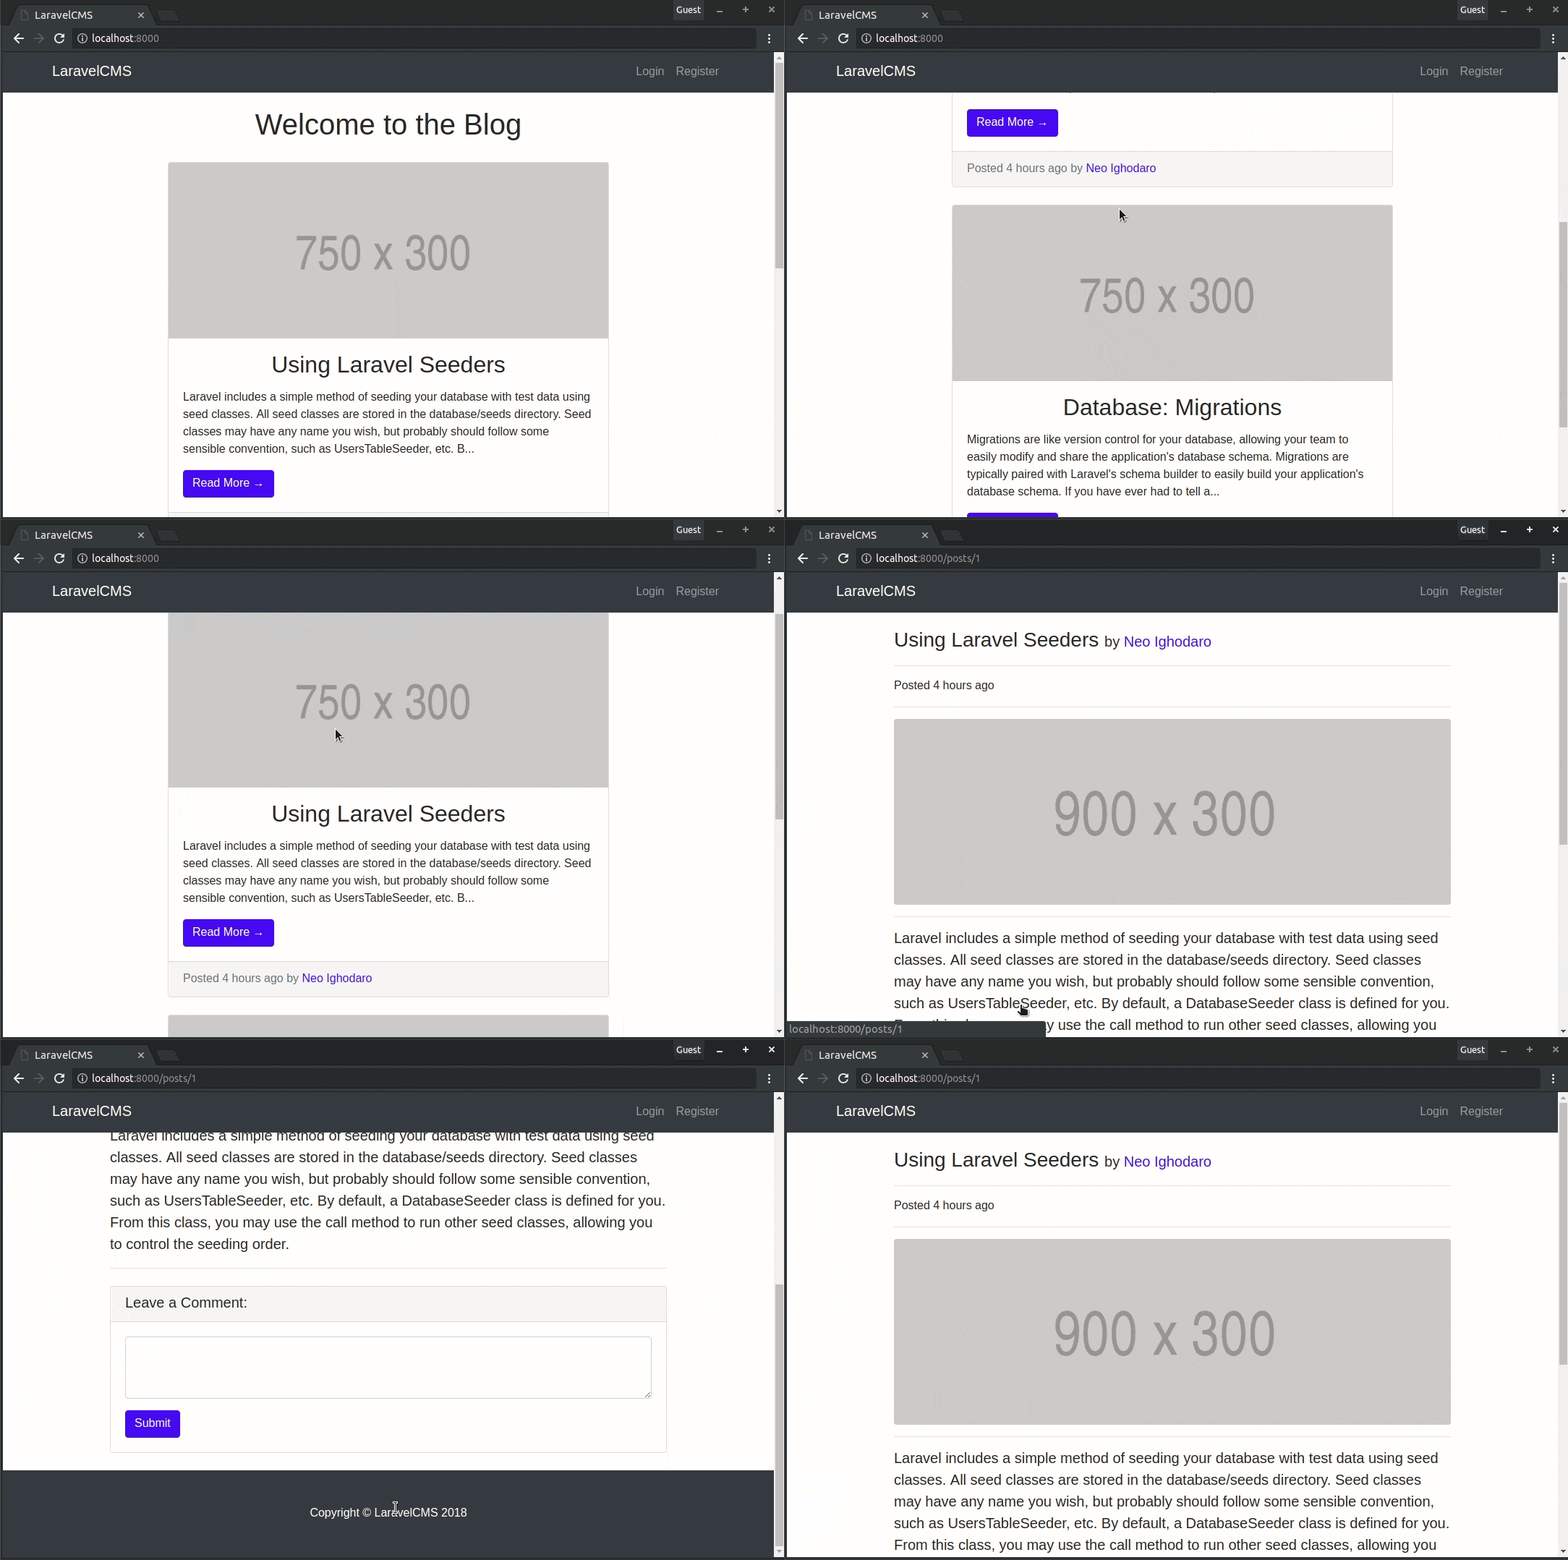
We can visit http://localhost:8000 to see our application and there should be exactly two posts available; these are the posts we seeded into the database during the migration:

When testing with Postman always set the
Content-Typeheader toapplication/json.
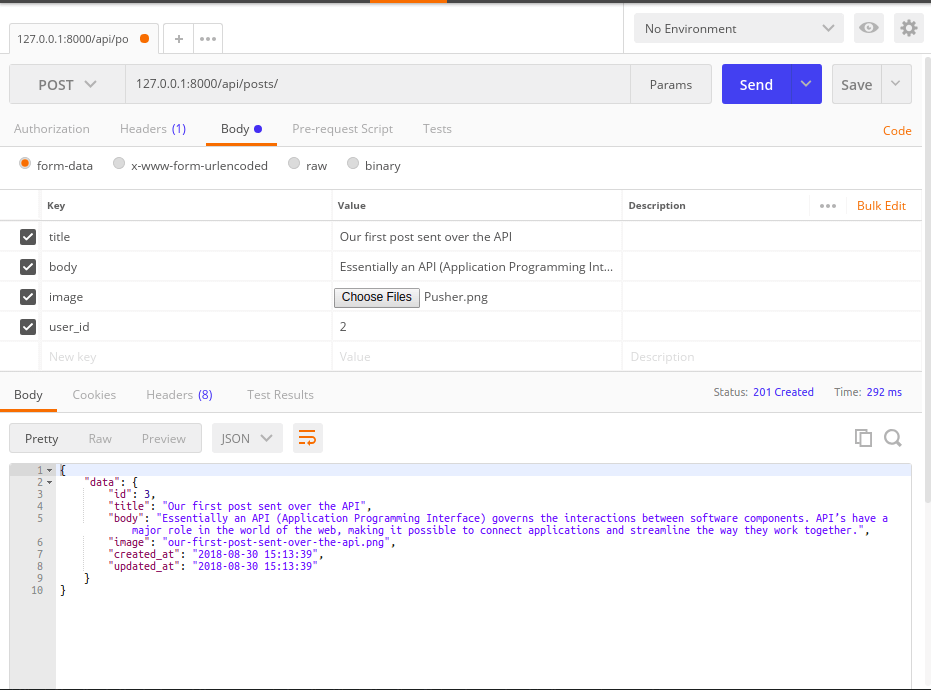
Now let’s create a new post over the API interface using Postman. Send a POST request as seen below:

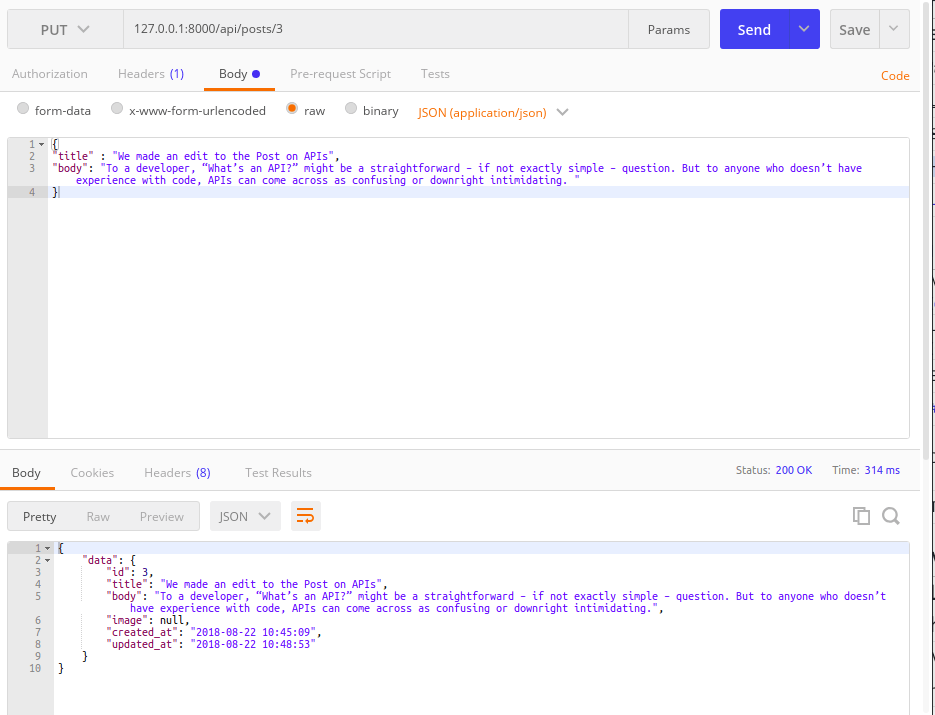
Now let’s update this post we just created. In Postman, we will pass only the title and body fields to a PUT request.
To make it easy, you can just copy the payload below and use the raw request data type for the Body:
    {
      "title": "We made an edit to the Post on APIs",
      "body": "To a developer, 'What's an API?' might be a straightforward - if not exactly simple - question. But to anyone who doesn't have experience with code. APIs can come across as confusing or downright intimidating."
    }

We could have used the PATCH method to make this update, the PUT and PATCH HTTP verbs both work well for editing an already existing item.
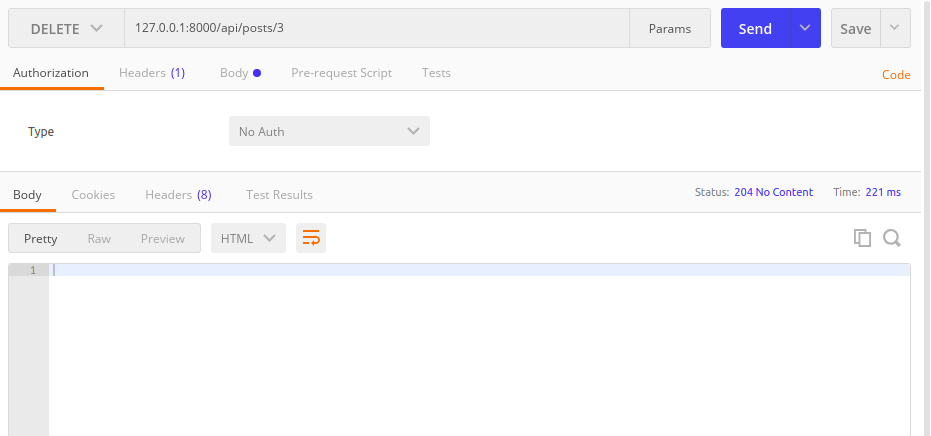
Finally, let’s delete the post using Postman:

We are sure the post is deleted because the response status is 204 No Content as we specified in the PostController.
Conclusion
In this chapter, we learned about Laravel’s API resources and we created a resource class for the Post model. We also used the apiResources() method to generate API only routes for our application. We wrote the methods to handle the API operations and tested them using Postman.
In the next part, we will build the admin dashboard and develop the logic that will enable the admin user to manage posts over the API.
The source code for this project is available here on Github.
2 October 2018
by Neo Ighodaro